Attention: The correct hardware setup is always the responsibility of the end customer.
Setting up the FUJITSU Network Scanner N7100E
1.Set up the "Network Scanner Admin Tool": to continue setting up the scanner, you will need a (free of charge) additional programme provided by Fujitsu. This enables the actual scanning procedure to be set up as wells as access to the full administrator menu from a PC.
2.Please download directly from the Fujitsu website: http://imagescanner.fujitsu.com/global/dl/index.html. Choose "Network Scanner", "N7100E" followed by your operating system -> "Network Scanner Admin Tool".
3.Set up the scan function to a network folder:
The following items must be set up:
• A job group that signs on to the scanner
• A job menu that can be assigned to this group
• A job sequence that includes the scanner settings
• A connection to a network folder
Network folder: the global archive folder of cks.DMS must be set up under "Save" -> "Network folder" -> "Network path" .

Note:
When specifying the path, the domain may also have to be prefixed. (\\\domain\IP server\folder).
Job sequence: Create a new sequence
General settings: If titles or messages are set, they are displayed to the user on the scanner before scanning starts.
Scanner settings:
Function |
Setting |
File format |
PDF/A |
Separation mode |
Patch-Code |
Remove seperator |
Yes |
Paper source |
Feeder (front page) / both sides if required |
Image mode |
Greyscale |
Resolution |
300dpi |
Job settings |
"Save" -> "Search" |
The other basic settings do not need to be changed.
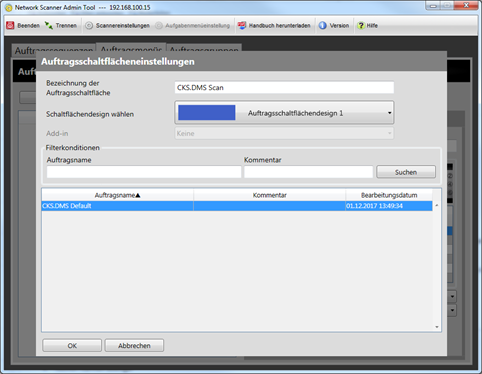
Job menu: Create a new menu with a job button that refers to the sequence already created.
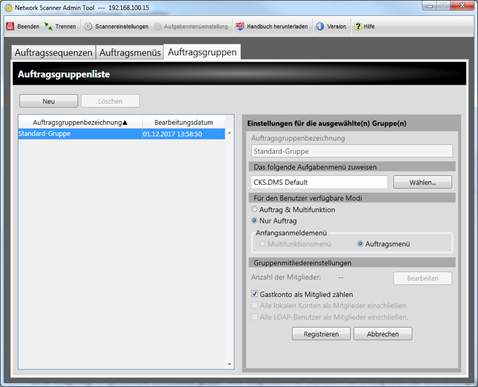
Job group: Select "Default group" -> It is also important to allow only jobs from available mode.